One of the most serious tasks you will come across in WordPress is how to change the permalink in WordPress. Changing permalink in WordPress on your website as it has the potential to affect your SEO. Failure to handle this process well can result in many broken links and errors.
Did you know that every page and post on your blog has been given a special permalink? And, a predetermined structure gets used in building-up these links. Sometimes, WordPress change homepage permalink for your posts is essential. However, this can result in problems with broken links in your content, expired links from external websites, and search rankings.
So, the ideal means of avoiding these problems with your permalinks is having a crystal-clear strategy for updating before implementation. After that, you can quickly go about how to update permalinks in WordPress, and gain from optimized permalink design. Furthermore, you should avoid 404 errors by understanding how to establish redirects effectively.
In this article, we shall define permalinks. And, reasons why you should change permalink WordPress on your website. Besides that, we shall offer a guide on how to update permalinks in WordPress well, avoiding internal and external errors from broken links using redirects.
What Are Permalinks?
The section of a web address that follows the domain name is known as a permalink. For instance: https://www.helpbot.net/how-to-regenerate- Permalinks-WordPress/. From this, www.helpbot.net is the domain name. And, how-to-Regenerate-Permalinks-WordPress is the permalink.
WordPress change permalink for one page when set well serves vital purposes. For instance:
- It helps you to keep everything organized because permalinks are a unique identifier for every piece of content you make.
- It provides a permanent location for search engines and your visitors to come back and read your content.
- Search engines use them to locate a specific page or topic from the URL.
- Permalinks enable your readers to have a short understanding of your page or post topic without checking the content.
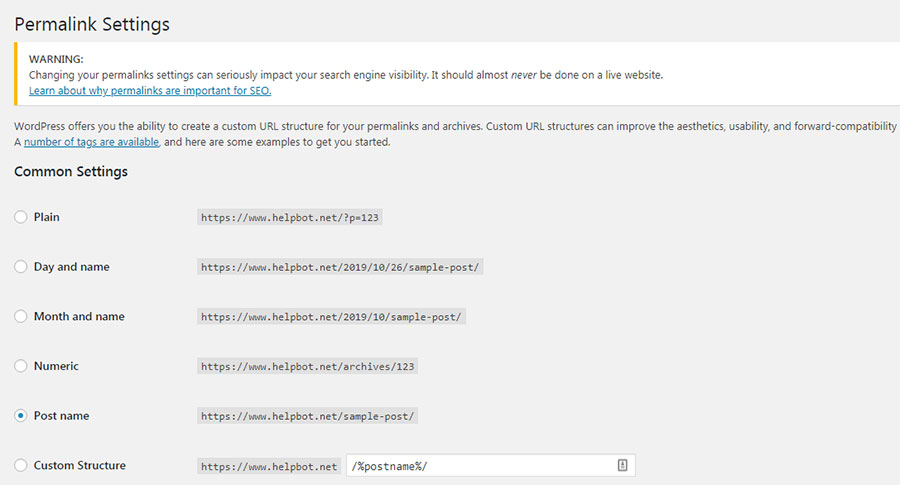
Are you looking for WordPress change homepage permalink set up in your blog? Go to your WordPress Dashboard>>Settings>>Permalinks. By default, the Day and name choice are what WordPress permalinks use. As a result, this design ensures the goal of your post remains clear to search engines and readers.
For most people, they modify the default permalink design of their WordPress blog when creating it. You can do so using any of the various choices available. However, the most usual options are the design, which indicates the date and the post name. And, just the post name. The intended content should be in mind to create this option. For instance, sites that concentrate on news items in most cases have the date as a section of the permalink design.
Nonetheless, how to change permalink design when building a site should be easier. Likewise, the process of how to update permalinks in WordPress should be smooth for an existing website. The act of WordPress change homepage permalink is easier like choosing a new permalink kind, followed by clicking save. But, the results need some serious talks.
Why Should You Consider Modifying Your WordPress Permalink design?
Do you still use the default setting of your permalink design? If so, you should consider how to update permalinks in WordPress. Whether it is on a new or existing website, the process of changing permalinks is easier.
But, ensure you have a clear plan before implementation, as changing the design on an existing website may lead to negative effects. So, make careful considerations if it is important or not to change your WordPress permalink structure.
Even so, here are some reasons why you should change your WordPress permalinks:
- Most people make investment by buying sites which are already established. Thus, there are chances you either bought or inherited your site from the real owner. For this reason, you should consider updating the permalink design for re-branding reasons if the site is live.
- You might be moving your website in a different way, which needs you to update permalinks in WordPress to show the change. For example, if you want your website to be about news, your permalinks should have the dates.
- If you established your website using an older WordPress version, you might be using the previous default design that comprises the post ID. But, this design does not offer any important information regarding your content. And, it adds no value to SEO.
There is no need of changing your present design if it works for your brand and content. But, if you are looking for ways on how to update permalinks in WordPress, check below.
How to Safely Change Permalink in WordPress Pages
Ensure you are using permalinks on your website, before you change your WordPress website permalink structure. Once you decide to start a new permalink structure on your website, it means to change your WordPress permalinks. Here is how to do it:
Step 1: Change your WordPress Permalink Design
Have you decided on the syntax you want to use on your WordPress website? If so, go to your WP Dashboard >> Permalinks menu and implement the change. In short, go to Dashboard>> Settings>> Permalinks. Here, just select your ideal way on how to change the permalink in WordPress pages.

After making your selection, click the “Save Changes” button. Now, all your permalinks are updated. This action updates all your internal URLs with your chosen syntax.
Further, if you have added all your internal links as part of your WordPress, they should update without issues. Remember to update manual links. But, all other links to your website from elsewhere are now broken. Likewise, all content that is indexed by the search engines is now incorrect.
Step 2: Correct Broken Links with 301 Redirects
How to change the permalink on your WordPress website is an easier process. Even so, you must handle the consequences of the action. As a result of the change, each reference to your previous links gets broken. Both from external websites and from within your content. In addition, any of your content which had been indexed by the search engines is incorrect.
The easiest way of solving this issue is setting up 301 redirects on your site. Basically, the 301 redirects inform any browser which visits your website using the old permalinks URL where to find the necessary content. Besides that, they allow search engines to understand the change is permanent.
Moreover, you might want to modify your 404 pages to detect any missed internal or manual links that are broken. Not long ago, you were supposed to manually add all these redirects on the .htaccess file of your web server. Luckily, we now have WordPress plugins that do all this on your behalf.
How to use the simple 301 Redirects plugin?
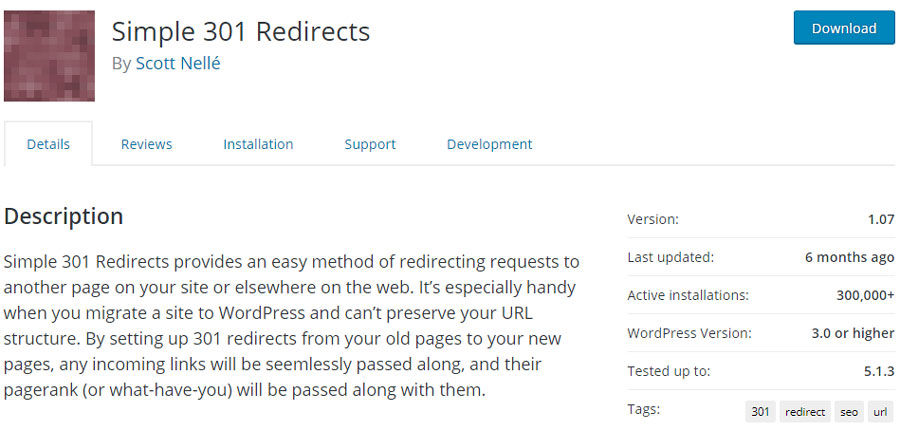
Among the simplest options of creating redirects on your WordPress website is using the Simple 301 Redirects plugin. After installing and activating this plugin, it creates another menu to your Settings dashboard.
However, the 301 Redirects settings window displays a two simple fields. These fields are labeled as Request and Destination. Here, you enter your old and new permalink designs respectively. The only need to add some information after your domain name in the two fields. After that, save the changes by clicking the “Save Changes” button. In turn, any search engine traffic which uses the old permalinks get redirected to their interested content.
How to use the Redirection Plugin?
The free Redirection plugin is the other tool you can use to add and manage redirects on your website. Even so, you should first install this plugin to use it.
After installation, go to Tools>> Redirections to implement the redirection changes. All you need is to put the old permalink in the Source URL field. Once done, go to the Target URL field and put the new permalink. Now click the “Save” button.
How to use Yoast SEO Permalink Helper
The Yoast SEO Permalink Helper is another useful tool to make redirects and post name. This tool produces a code according to your present permalink design. You can manually add this code on the .htacess file of your website to safely redirect all your posts to your new postname design. Although this tool is handy, it regenerates the code for only redirecting to the postname design.
Thus, it is advisable you use any of the two free plugins.
Step 3: Change Search Engine Permalinks to the New Design (Re-indexing)
As stated earlier, one of the effects of updating your permalinks is that search engines get incorrect information. Unfortunately, you cannot regulate this problem. Reason being, search engines do crawl websites and update the changes with time.
However, you can assist the updating process by making an XML Sitemap. After that, do manual re-indexing of your website with search engines.
Conclusion
It is advisable you check your permalinks before launching your website. But, it is good you check how to update permalinks in WordPress after launching your site. Further, if you want to change the permalink in WordPress, first plan the procedure before doing anything.
If you have any questions, comments, or suggestion on how to update permalinks in WordPress, use our comment section.


